Scrypted
Scrypted Integration
Overview
Zentik integrates seamlessly with Scrypted to send notifications from your Scrypted automations and devices to your Zentik-connected devices. This allows you to receive rich notifications on your mobile devices when events occur in your Scrypted setup.
The Advanced Notifier plugin in Scrypted is fully integrated with Zentik, providing comprehensive notification capabilities. With this integration, you can send multiple media attachments simultaneously in a single notification, making it perfect for security camera feeds, event recordings, and rich media alerts.
Prerequisites
Before proceeding, ensure you have:
- ✅ A Zentik account
- ✅ Scrypted installed and running
- ✅ A bucket created with an Access Token generated
For detailed instructions on creating a bucket and generating access tokens, see Bucket Creation.
Create a Bucket with Access Token
First, you need to create a bucket in Zentik and generate an access token:
- Create a new bucket in Zentik (or use an existing one)
- Navigate to your bucket settings
- Go to the Access Tokens section
- Click Generate New Token
- Copy both the Bucket ID and Access Token - you'll need both for the Scrypted configuration
Note: Make sure to save your Access Token securely, as it won't be shown again after generation.
Install the Plugin
Install the Zentik Notifier plugin in Scrypted:
- Open your Scrypted dashboard
- Go to Plugins or use the plugin marketplace
- Search for "Zentik" or "Zentik Notifier"
- Click Install to add the plugin to your Scrypted instance
- Wait for the installation to complete
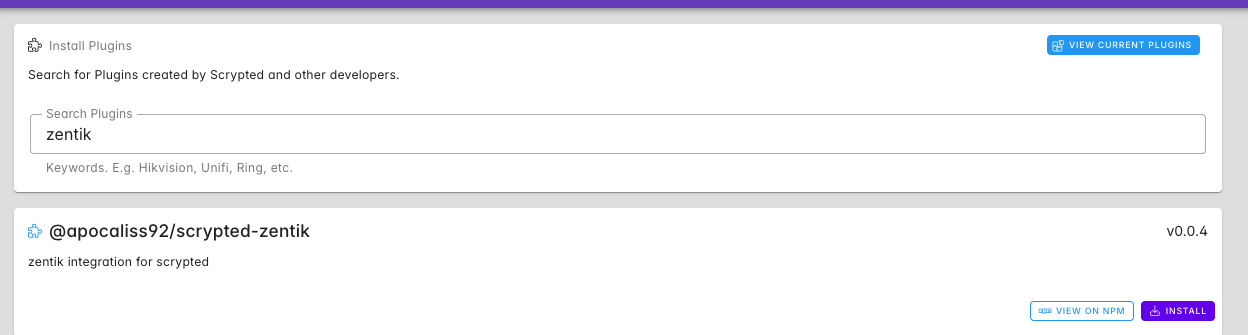
Install the Zentik Notifier plugin from the Scrypted plugin marketplace
Configure Credentials
After installing the plugin, configure it with your Zentik bucket credentials:
- Open the Zentik Notifier plugin in Scrypted
- Navigate to the plugin settings/configuration page
- Enter your Zentik credentials:
- Bucket ID: Paste your Zentik bucket ID
- Access Token: Paste your Zentik access token
- Server URL (optional): Your Zentik API endpoint (defaults to
https://notifier-api.zentik.app/messages)
- Click Save or Apply to save the configuration
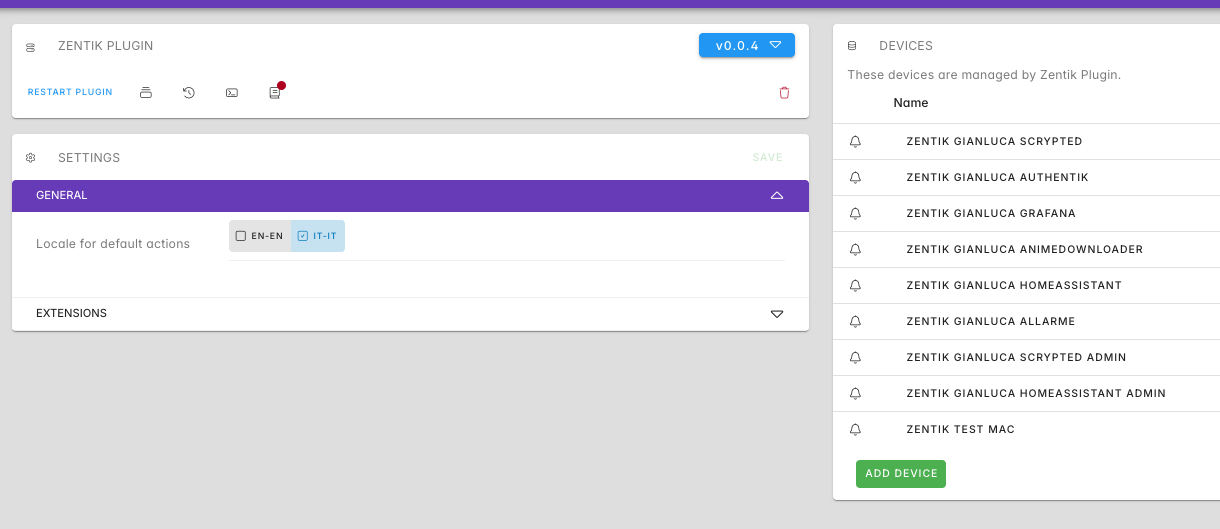
Main configuration screen of the Zentik Notifier plugin
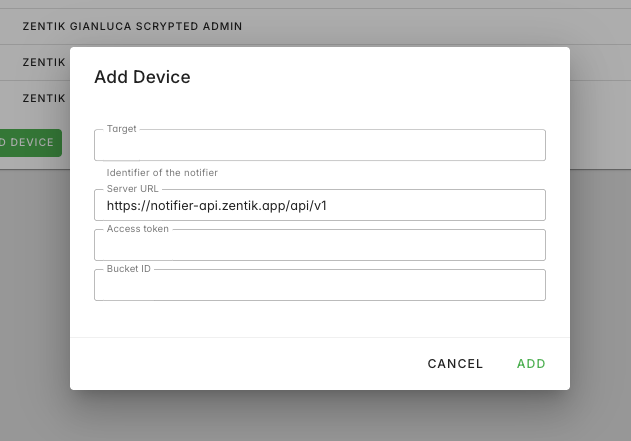
Create and configure the Zentik notifier with bucket credentials
Usage
Once configured, you can use Zentik as a notification provider in your Scrypted automations:
- Create or edit an automation in Scrypted
- Add a Send Notification action
- Select Zentik as the notification provider
- Configure your notification message, title, and any additional options
- Test the automation to verify notifications are being sent
Testing
To verify the integration is working:
- Use the Test button in the Zentik Notifier plugin settings, or
- Trigger a test notification from one of your Scrypted automations
- Check your Zentik-connected devices - you should receive the notification
If you don't receive notifications, verify:
- Your Bucket ID and Access Token are correct
- The plugin is enabled and running
- Your device is connected to Zentik and subscribed to the bucket
- Check Scrypted logs for any errors
Features
- Rich Notifications: Send detailed notifications with titles, messages, and metadata
- Multiple Media Attachments: Send multiple images, videos, or other media files simultaneously in a single notification
- Advanced Notifier Integration: Full integration with Scrypted's Advanced Notifier plugin for enhanced notification capabilities
- Automation Integration: Use Zentik notifications in Scrypted automations and rules
- Device Targeting: Target specific users or devices through bucket configuration
- Reliable Delivery: Direct integration with Zentik's notification infrastructure
Resources
- Bucket Creation Guide: How to create buckets and generate credentials
- Scrypted Documentation: Official Scrypted documentation
- Notifications Documentation: Learn more about Zentik notifications