Authentik
Authentik Integration
Overview
Zentik integrates with Authentik to send authentication and security event notifications directly to your Zentik-connected devices. When Authentik detects login events, security issues, or other authentication-related activities, you'll receive rich notifications on your mobile devices.
Zentik automatically parses and transforms Authentik webhook payloads, so no manual mapping is required. Simply configure the webhook URL and Zentik will handle the rest.
Prerequisites
Before proceeding, ensure you have:
- ✅ A Zentik account
- ✅ Authentik installed and running
- ✅ A bucket created with an Access Token generated (or Magic Code enabled)
For detailed instructions on creating a bucket and generating credentials, see Bucket Creation.
Create a Bucket with Access Token
First, you need to create a bucket in Zentik and obtain your credentials:
- Create a new bucket in Zentik (or use an existing one)
- Navigate to your bucket settings
- Choose one of the following authentication methods:
- Option 1: Generate an Access Token:
- Go to the Access Tokens section
- Click Generate New Token
- Copy both the Bucket ID and Access Token
- Option 2: Enable Magic Code:
- Enable Magic Code in your bucket settings
- Copy the generated code
- Option 1: Generate an Access Token:
Note: Make sure to save your credentials securely, as Access Tokens won't be shown again after generation.
Configure in Authentik
Configure Zentik as a webhook notification transport in Authentik:
- Open your Authentik dashboard
- Go to Applications → Notification transports (or System → Notification transports)
- Click Create to create a new notification transport
- Configure the transport:
-
Name: Give your transport a descriptive name (e.g., "Zentik Notifications")
-
Mode: Select Webhook (generic)
-
Webhook URL: Build the webhook URL:
curl -X POST \
  "https://notifier-api.zentik.app/transform?parser=ZENTIK_AUTHENTIK&magicCode=YOUR_MAGIC_CODE"
Replace
YOUR_MAGIC_CODEwith your actual Magic Code from your bucket settings.curl -X POST \ "https://notifier-api.zentik.app/transform?parser=ZENTIK_AUTHENTIK&bucketId=YOUR_BUCKET_ID" \ -H "Authorization: Bearer YOUR_ACCESS_TOKEN"Replace
YOUR_BUCKET_IDandYOUR_ACCESS_TOKENwith your actual credentials from your bucket settings.
-
- Click Save to create the transport
- Click Test to send a test notification and verify the integration is working
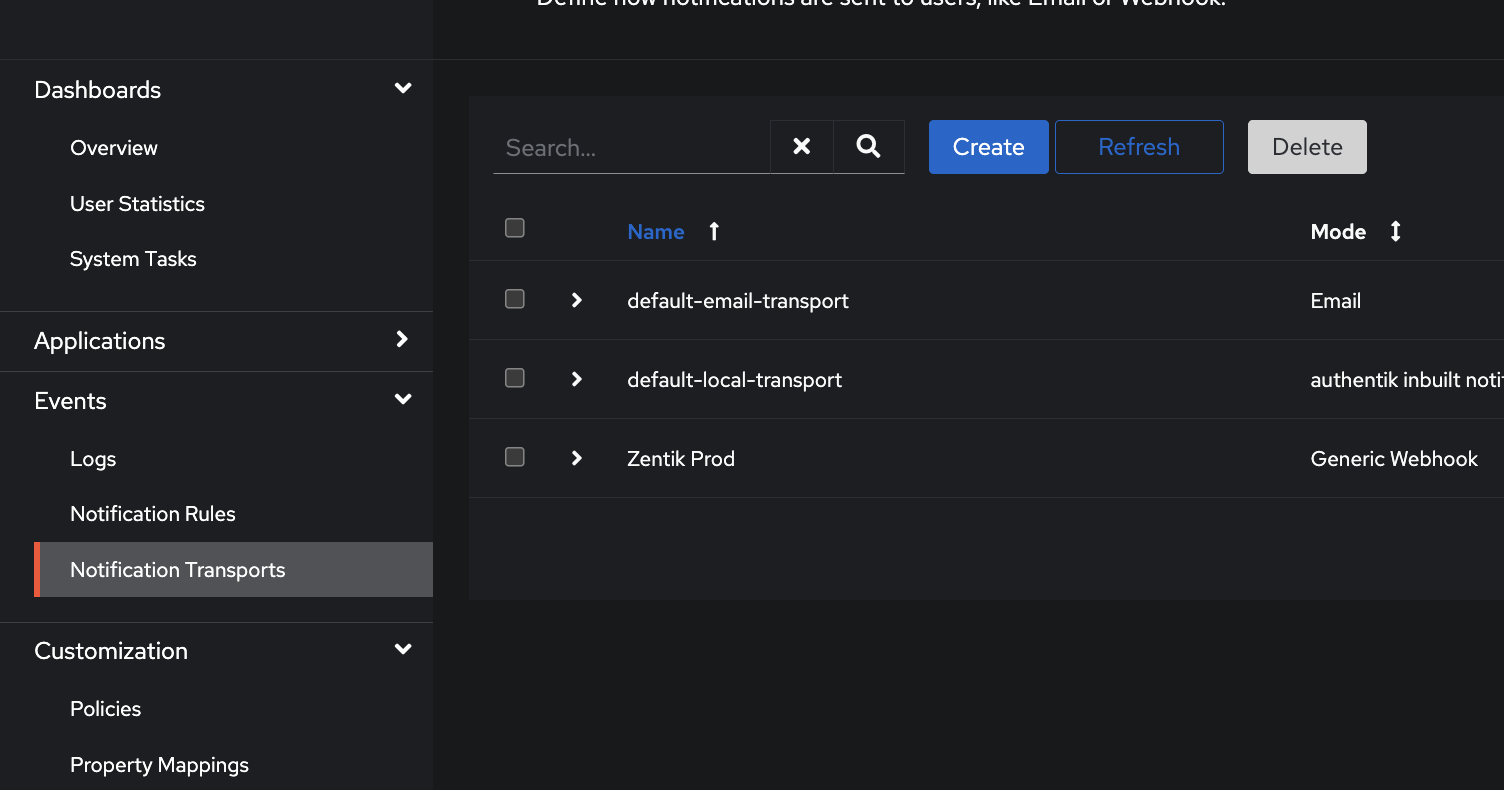
Go to Notification transports in Authentik
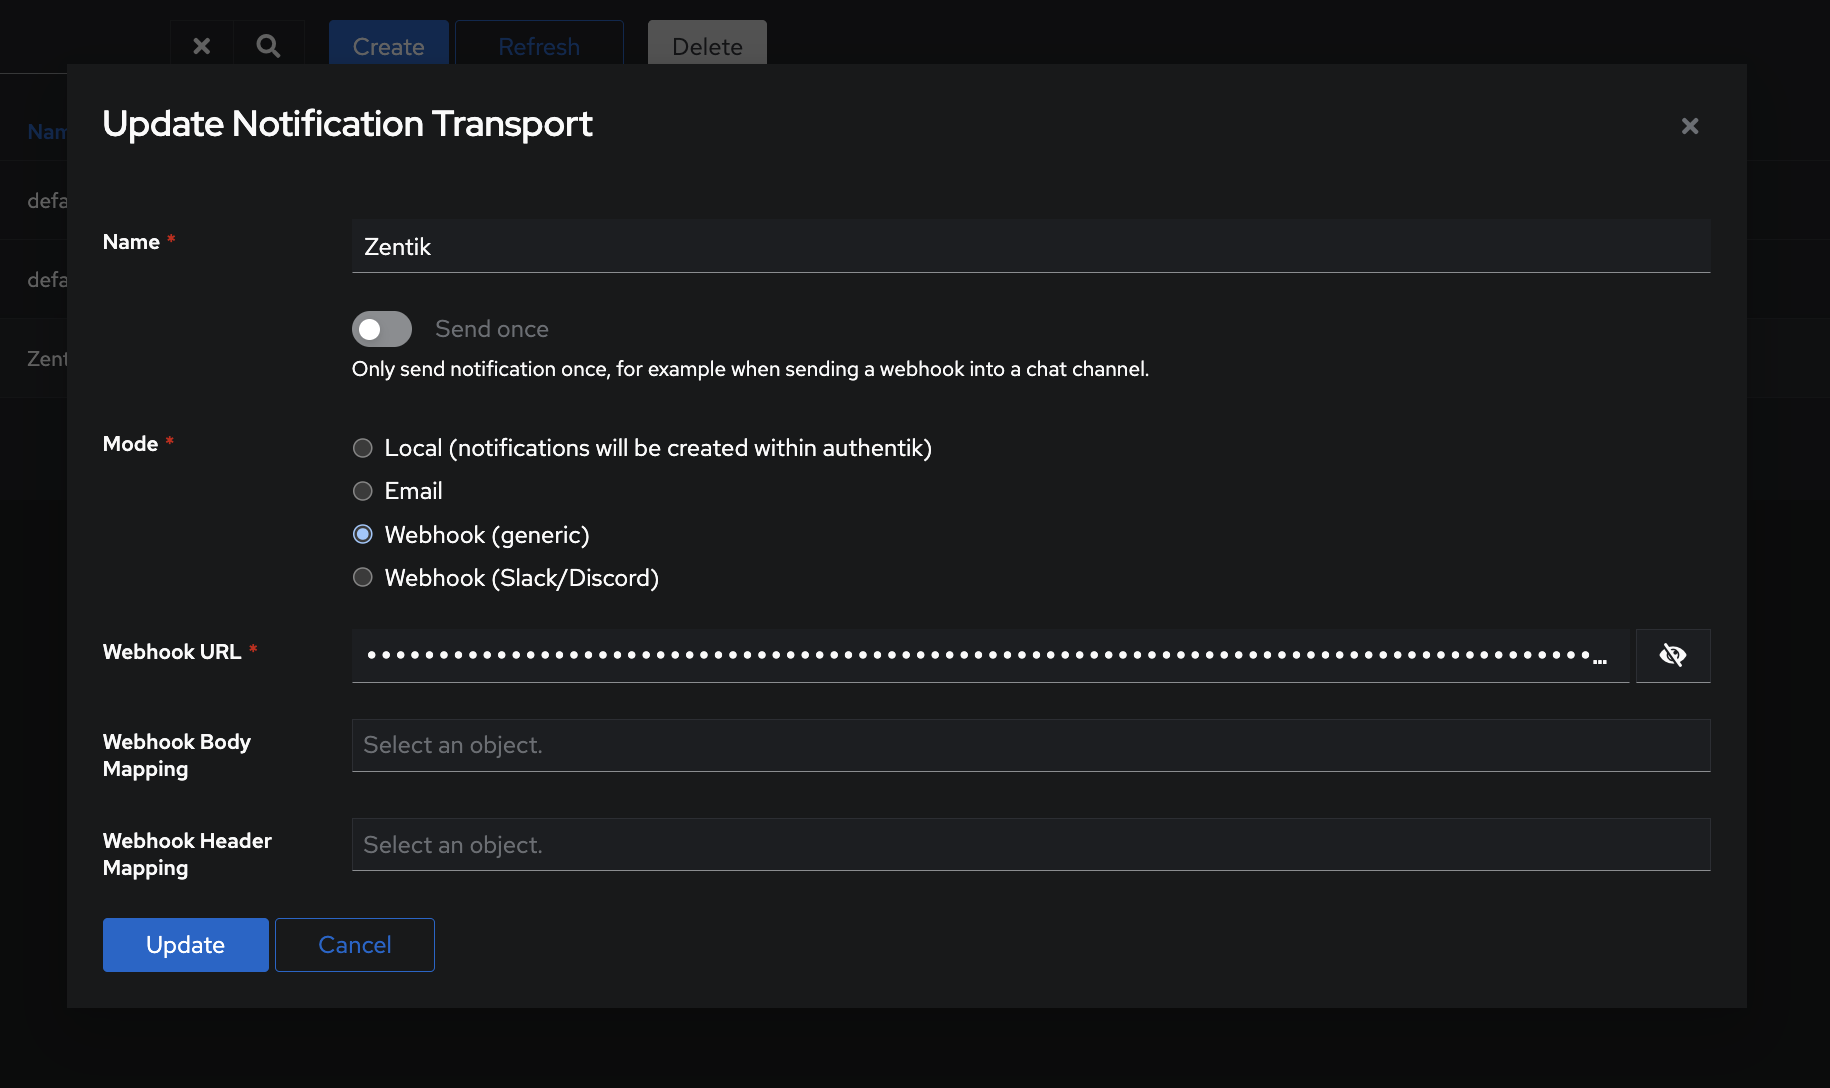
Create a new webhook transport with Zentik URL
Note: The
parser=ZENTIK_AUTHENTIKparameter tells Zentik to automatically parse and transform the Authentik webhook payload into a formatted Zentik notification. No additional mapping configuration is needed.
Assign to Notification Rules
After creating the transport, you need to assign it to the notification rules where you want to receive Authentik events:
- Go to Applications → Notification rules (or System → Notification rules)
- Select or create a notification rule
- In the rule settings, select your Zentik transport in the Transports field
- Configure which events should trigger notifications (login success, login failure, password reset, etc.)
- Save the notification rule
The Zentik transport will now send notifications to your Zentik-connected devices for all events matching the notification rule.
Features
- Automatic Payload Parsing: Zentik automatically parses Authentik webhook payloads - no manual mapping required
- Rich Notifications: Receive detailed information about authentication events, including user details, IP addresses, and event types
- Multiple Event Types: Configure notifications for login events, security alerts, password changes, and more
- No Manual Mapping: Zentik handles all payload transformation automatically through the built-in
ZENTIK_AUTHENTIKparser - Reliable Delivery: Direct integration with Zentik's notification infrastructure
Resources
- Bucket Creation Guide: How to create buckets and generate credentials
- Authentik Documentation: Official Authentik documentation
- Transform Parsers: Learn more about Zentik parsers
- Notifications Documentation: Learn more about Zentik notifications