Uptime Kuma
Uptime Kuma Integration
Overview
Zentik integrates with Uptime Kuma to send monitoring alerts and status notifications directly to your Zentik-connected devices. When Uptime Kuma detects that a monitored service goes down, comes back up, or experiences issues, you'll receive rich notifications on your mobile devices.
This integration allows you to stay informed about your infrastructure's health in real-time, with detailed notification content including service names, status information, and monitoring data.
Prerequisites
Before proceeding, ensure you have:
- ✅ A Zentik account
- ✅ Uptime Kuma installed and running
- ✅ A bucket created with an Access Token generated
For detailed instructions on creating a bucket and generating access tokens, see Bucket Creation.
Create a Bucket with Access Token
First, you need to create a bucket in Zentik and generate an access token:
- Create a new bucket in Zentik (or use an existing one)
- Navigate to your bucket settings
- Go to the Access Tokens section
- Click Generate New Token
- Copy both the Bucket ID and Access Token - you'll need both for the Uptime Kuma configuration
Note: Make sure to save your Access Token securely, as it won't be shown again after generation.
Configure in Uptime Kuma
Configure Zentik as a webhook notification in Uptime Kuma:
- Open your Uptime Kuma dashboard
- Go to Settings → Notifications
- Click Set up Notification
- Set Notification Type to Webhook
- Configure the webhook settings:
- POST URL:
https://notifier-api.zentik.app/message - Method:
POST - Request Body: Select Custom Body and paste the following JSON:
{ "title": "{{ name }} - {{ status }}", "deliveryType": "NORMAL", "bucketId": "your_bucket_id", "body": "{{ msg }}\n{{ hostnameOrURL }}", "locale": "en-EN", "addMarkAsReadAction": true, "addDeleteAction": true, "addOpenNotificationAction": true }Note: Replace
your_bucket_idwith your actual Zentik bucket ID. You can use any attribute from the Message documentation. - Additional Headers: Enable this option and configure:
{ "Authorization": "Bearer Your_token", "Content-Type": "application/json" }Note: Replace
Your_tokenwith your actual Zentik access token.
- POST URL:
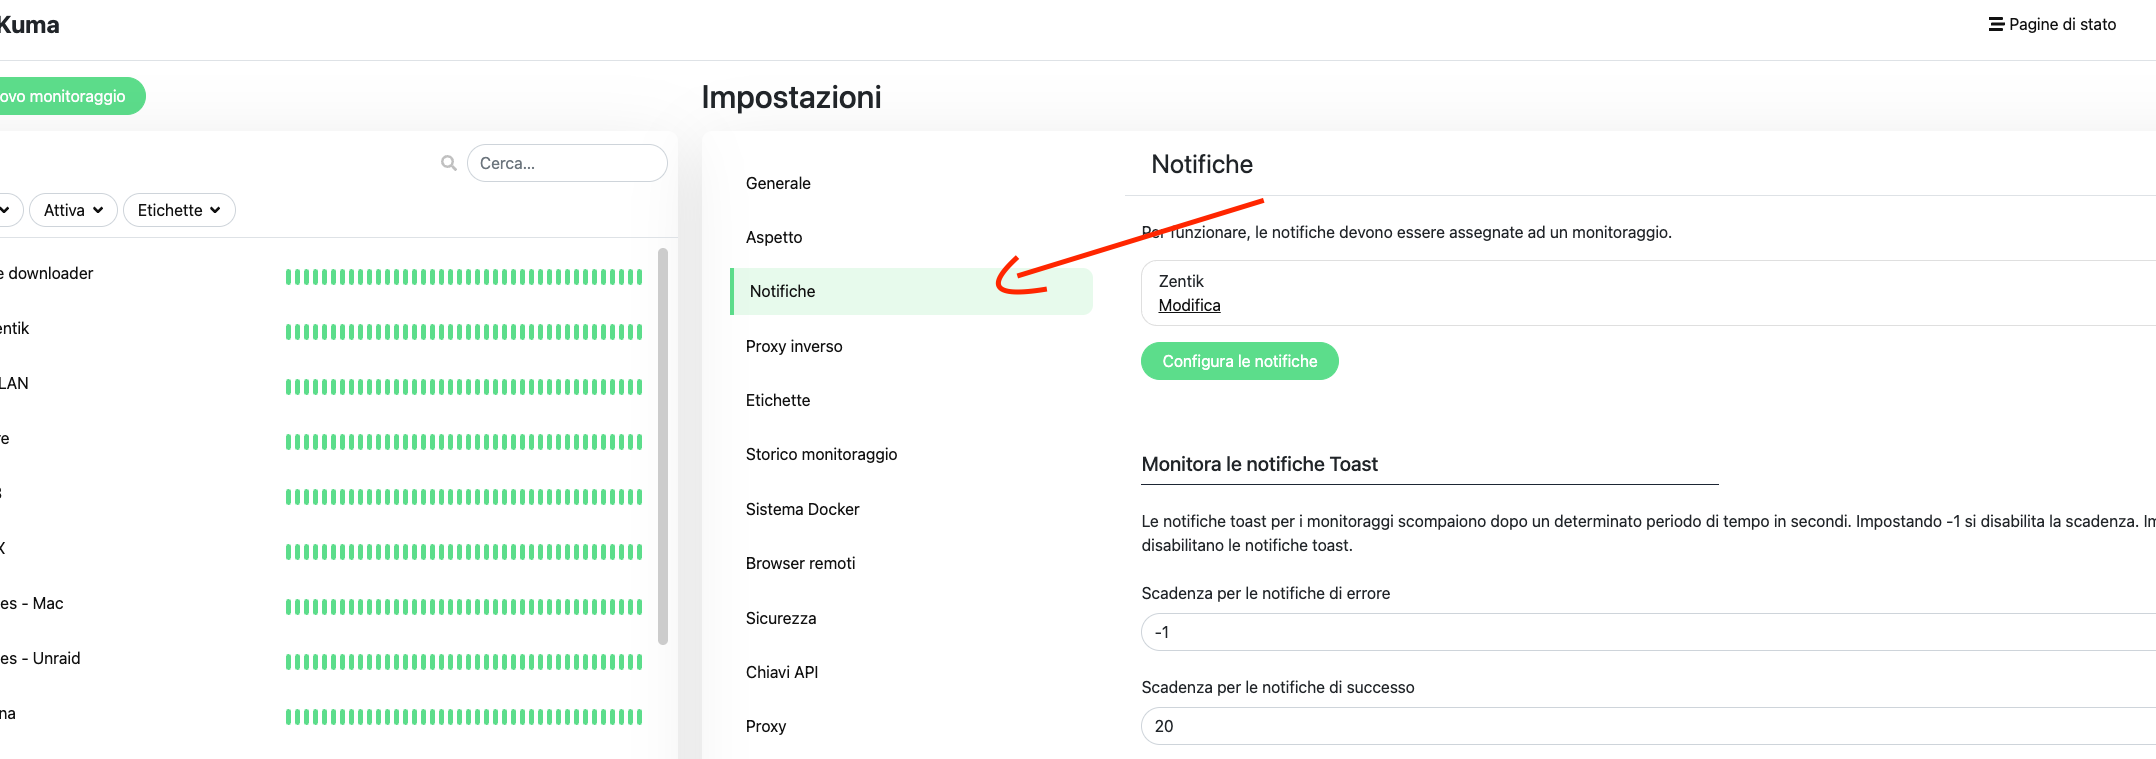
Go to Settings → Notifications in Uptime Kuma
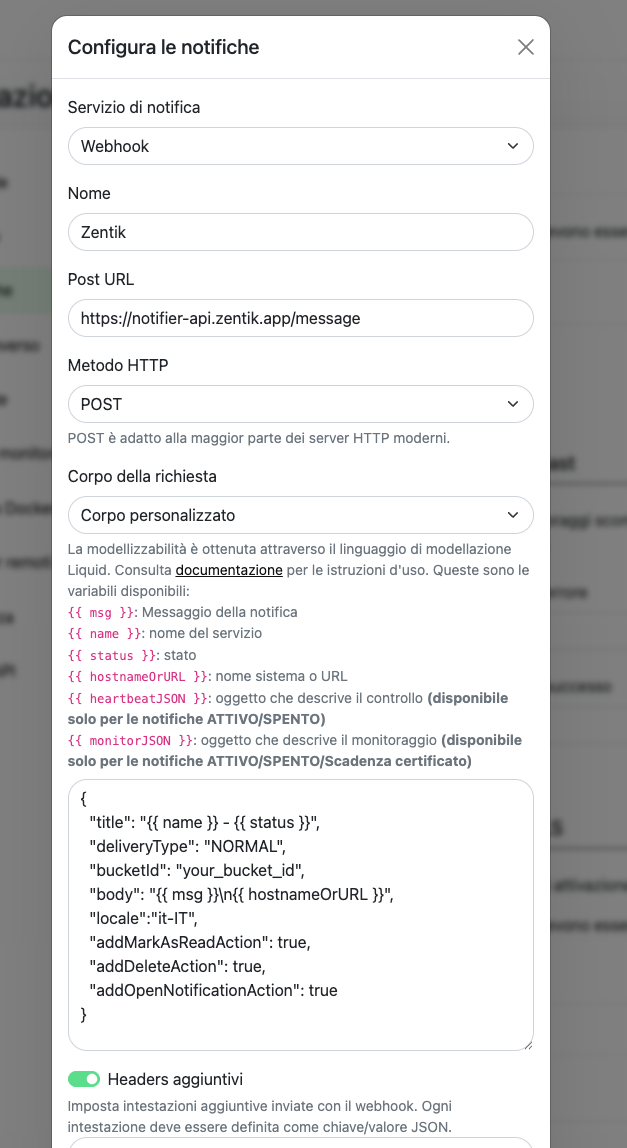
Click Set up Notification and select Webhook type
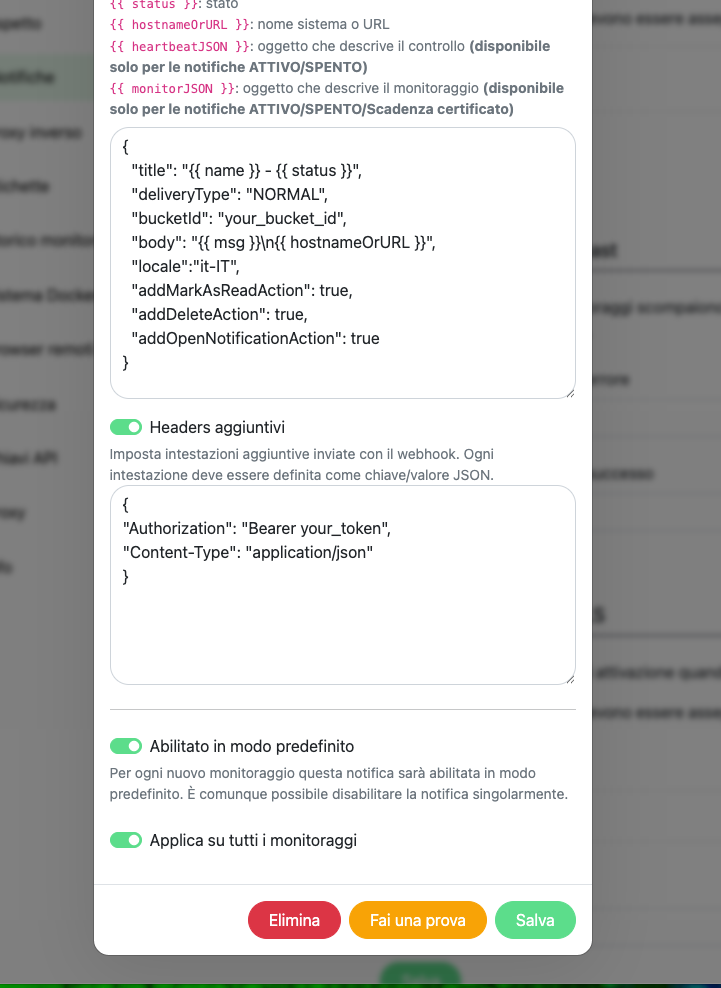
Configure POST URL, request body, and additional headers with bucket ID and access token
Resources
- Bucket Creation Guide: How to create buckets and generate credentials
- Uptime Kuma Documentation: Official Uptime Kuma documentation
- Notifications Documentation: Learn more about Zentik notifications